Ubuntu/Libvirt Up and Running on Mac Mini (Part 1)
mac ubuntu virtualization kvmGetting Ubuntu & KVM installed on a Mac mini for virtualization.
A mac mini (or NUC) makes a great entrypoint into homelab computing. They are quiet, power efficient, and have a generally high Wife Acceptance Factor (See here).
This is part 1 of a series for getting KVM/Libvirt up and running on a Mac mini. This part we will cover the initial installation & setup of Ubuntu.
Notes on Mac Models
Obviously this guide is geared towards more modern Intel Mac minis. In my case, I am working with a Late-2012 Mac mini, with 16 GB of RAM and a 512GB SSD. Many other Mac minis (or Macs) may work, but many will not. I will be putting together a guide for getting Debian installed on an early 2005 Mac mini, which required considerably more work.
Create Ubuntu Bootable USB
To get started, I’ll download the Ubuntu Server ISO (20.04 is the version at this time) from Ubuntu.com
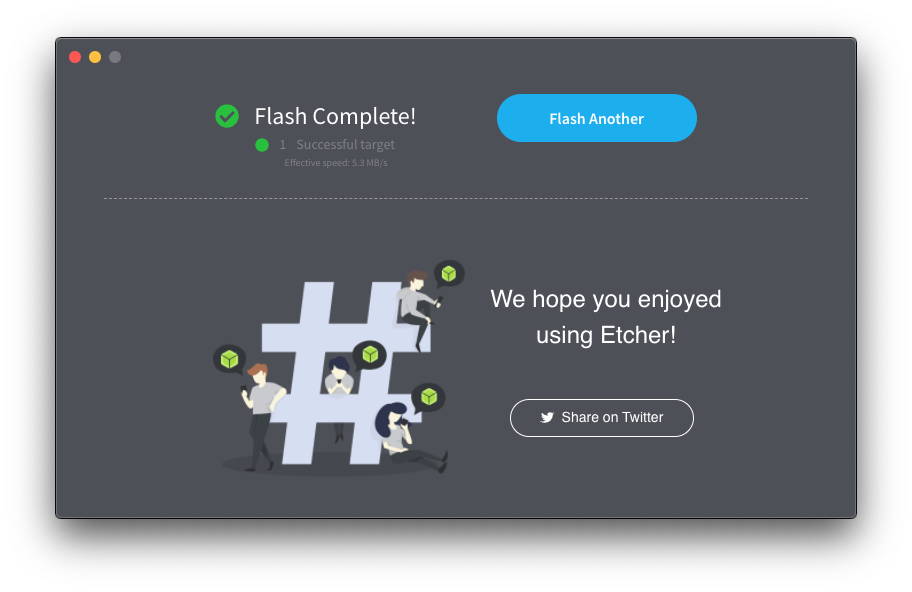
Once completed, I’ll need to write this out to a USB drive. You can definitely use dd for this, but I prefer to use balenaEtcher (formerly Etcher). If you are on Windows, I recommend using Rufus.
If you are using a Mac, you can easily install Etcher via brew brew cask install balenaetcher otherwise you can download it from balena.
Regardless of your tool, once downloaded, write that ISO to a USB drive.

Install Ubuntu
Once complete, your next step is to get your Mac mini booted into the live install USB.
It’s worth noting here that Mac minis (or any Macs for that matter) do not have any IPMI, Intel AMT, lights-out managemenet, etc. In order to get this setup and installed, you will need to get a keyboard and display plugged in. A mouse is not strictly necessary, since we will not be installing a GUI
Once your peripherals are all hooked up, plug in that USB drive, and power your Mac mini on. Once you push power, you’ll need to immediately hold the `Option" key on your keyboard.
If you do this too late, your Mac will skip the boot-selection screen, and start booting off whatever is installed on your internal drive.
If you do get your boot screen, it should look something like the image below:
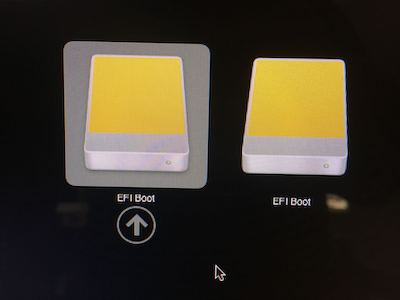
Using the arrow keys, hover over the USB drive, and hit Return. Assuming your USB drive is working, you should see a boot screen like the one here:

Hit Return again to boot the default menu option, and wait for the live image to fully boot into the installer. During boot up, your disk may “Check the integrity of the disk.” This is generally a good thing, and will help prevent issues later on the install process, by verifying the integrity of your installation media.
Once booted, you should be presented with the language selection:
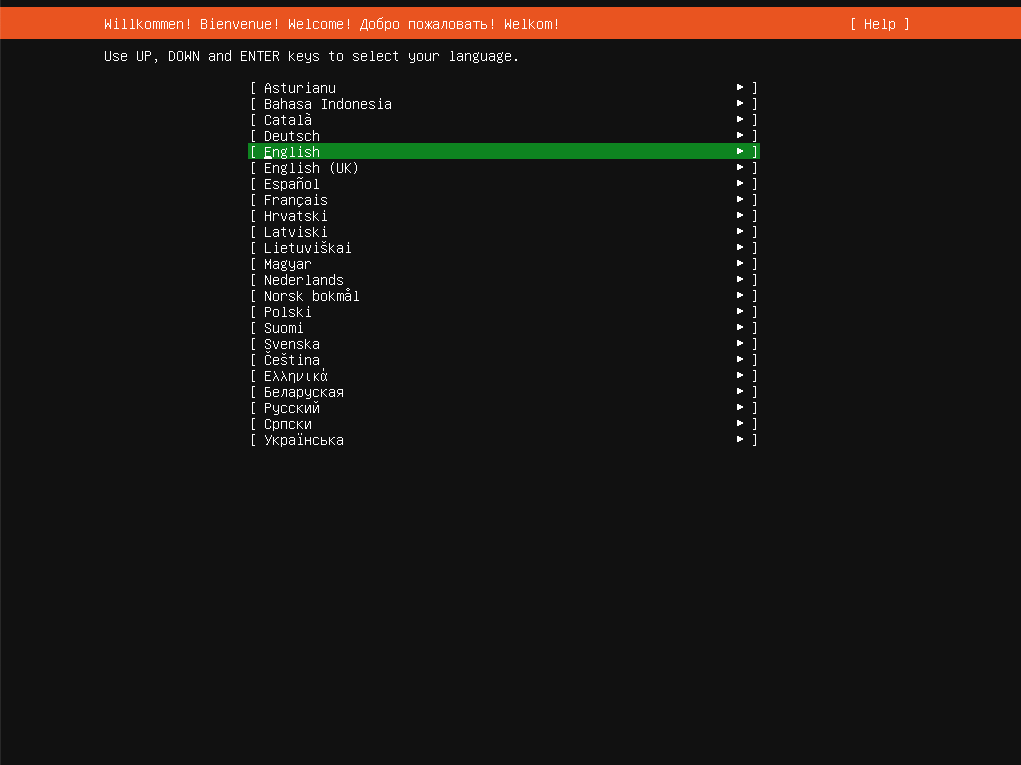
Select your language, and then hit Return. On the next screen, select your keyboard options, and then continue by highlighting and selecting Done
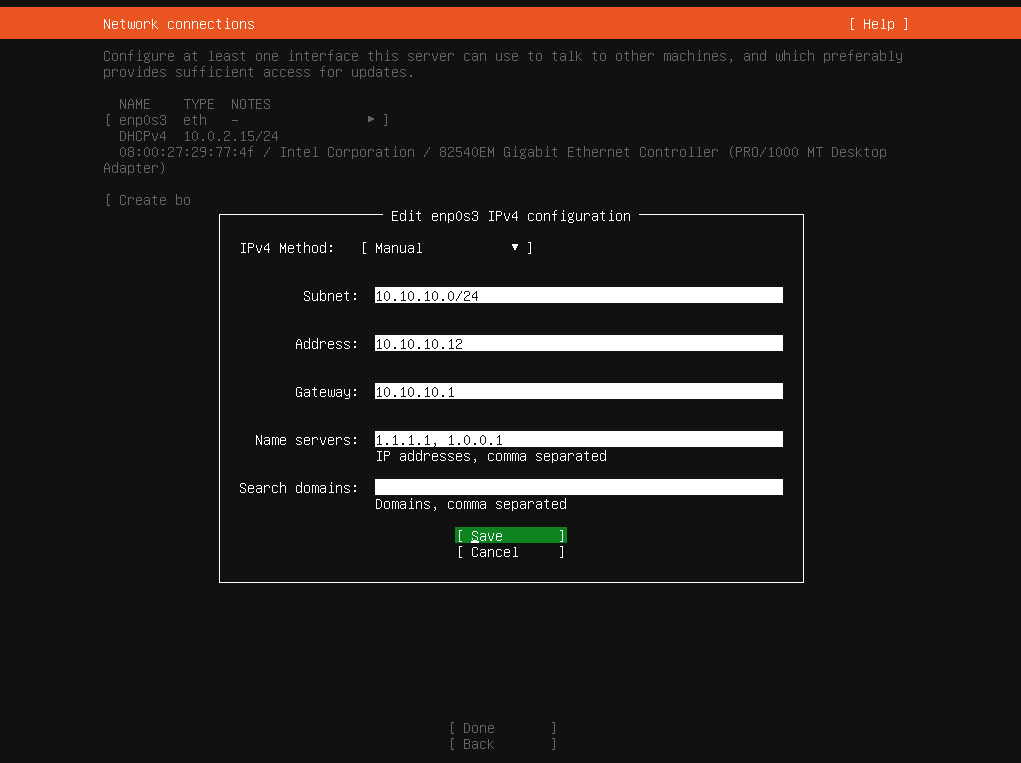
On the next screen, select your network options. I plan to leave mine using DHCP, so I leave the defaults and select Done. If you want to set a static IP for your machine, you can do so by selecting the network interface, then hitting return, Selecting Edit IPv4 and then changing the IPv4 Method to Manual. Fill in the required fields, and then save your changes.
Leave the proxy address empty (unless you have a proxy to use for this install) and continue. Same with mirror address.
Up next, select the disk to install Ubuntu to. If you have multiple disks, you’ll get to select which disk you want to install Ubuntu to. I select to Encrypt the LVM group with LUKS and then enter a passphrase. Once your selections are made, select Done.
You will then be presented with the partitions and LVM group data on the next page. If you are having Ubuntu generate and manage the creation of these partitions (the default option unless you did a custom creation in the last screen) you can select Done here too.
Confirm you are OK with overwriting the disk that you are installing to.
Notes on LUKS encryption
I personally encrypt all of my physical-host drives. Why? In the event a drive is stolen, or, more likely, if a drive fails or has to be disposed of, I don’t need to worry about erasing that data.
On the other hand, you may not want to do this if you don’t want to type in the LUKS password every time you boot or reboot your physical hosts. In the case of the Mac mini, this will require a display & keyboard to be plugged in for each reboot.
You can get around this by using something like Clevis & Tang (covered in a later tutorial).
Generally, you will have better performance encrypting at the host-level, instead of trying to encrypt every VM.
Once the disk is formatted, you will be prompted to setup an initial user, and set the machine hostname. Feel free to use any variables you want here, but make sure you remember the password you set, since this will be the only user who can administer this machine initially.
If you are using a configuration management tool (like Ansible) you can set your username & password to something you will use to bootstrap this host later on.
Once these settings are set, go ahead and select Done
Using the spacebar, select to Install OpenSSH server. Failing to do this will require you to install SSH later if you want remote access to this machine. You can also import an SSH identity (public key) if you have one that is accessible. Select Done
A list of popular snaps (What is a snap?) are presented. You don’t need to select any of these, and instead, select Done.
At this point, all of the option-selecting is done, and we are now presented with the install log. From this point, you’ll just need to wait until Ubuntu is done installing.
When the install is complete, you will be presented with a Reboot button under the install log. Select Reboot to boot into the new installation.
At this point, you should be able to remove your USB drive (you may be prompted to by the installer) and your Mac should boot into your new Ubuntu installation.
Booting Issues
Sometimes Macs want to boot into the last booted MacOS type thing, and when they aren’t presented with that choice, they have a temper tantrum and display a folder with a
?in it, instead of booting our new installation.To fix this, power off your Mac. Power it on, and hold the
Optionkey, like we did to get into the boot USB.When presented with boot options, hover over the new Ubuntu installation hard drive. Hold the
Controlkey down. You should see the arrow underneath become a circular arrow (meaning it will always boot from this in the future). While maintaining theControlkey, hitReturnto boot into this disk.
If you selected to encrypt your LVM group, during boot you will be prompted for the “passphrase.” Enter the passphrase (no output will be shown on-screen) and then hit Return.
Once booted, you should be prompted with a login screen. Login with the username & password set during installation.
Update Packages, Install KVM Packages
Upon login you should receive a welcome message and then the prompt:
Welcome to Ubuntu 20.04.1 LTS (GNU/Linux 5.4.0-47-generic x86_64)

 * Documentation:  https://help.ubuntu.com
 * Management:     https://landscape.canonical.com
 * Support:        https://ubuntu.com/advantage

  System information as of Fri 11 Sep 2020 08:40:12 PM UTC

  System load:  0.03              Processes:               125
  Usage of /:   26.5% of 8.28GB   Users logged in:         1
  Memory usage: 5%                IPv4 address for enp0s3: 10.0.10.68
  Swap usage:   0%


30 updates can be installed immediately.
0 of these updates are security updates.
To see these additional updates run: apt list --upgradable


Last login: Fri Sep 11 20:38:38 2020
$
Go ahead and update the package cache,
$ sudo apt update
and then upgrade any packages that need to be upgraded.
$ sudo apt upgrade -y
Once our packages are up-to-date, it’s time to install all of the KVM/Libvirt packages:
$ sudo apt install qemu-kvm libvirt-clients libvirt-daemon-system bridge-utils ovmf qemu-efi virtinst -y
ovmf qemu-efiare not technically required, but will allow VMs to use EFI
A large number of packages are installed here, as the dependencies for Libvirt, KVM, QEMU and related tools are high.
Once complete, run the kvm-ok command to ensure your machine is ready to virtualize:
$ kvm-ok
INFO: /dev/kvm exists
KVM acceleration can be used
Head over to Part 2 to configure networking, and start running VMs!